Google’s Nest smart thermostat promises to make our lives easier and more comfortable. It learns residents’ schedules and temperature preferences to provide a comfortable home environment at any time, without needing to push a single button!
However, smart features can sometimes work against users. Many Nest owners complain that their thermostat starts changing temperature for no reason, and there is nothing they can do about it. Not only being unable to control your thermostat is rather frustrating, but also letting it play with your room temperature can negatively impact your utility bills.
The Nest thermostat is an extremely convenient and useful device, so giving up on it would be a shame. That’s why this article will explain why the Nest thermostat changes room temperatures seemingly on its own and provide instructions on how to fix the issue. You may not even need to turn off its auto-scheduling options!
Reasons Why Your Nest Thermostat Keeps Changing the Temperature
Though Nest’s smart features make life easier, they are not entirely failproof. If it misreads your schedule, or your activities cause irregular leaving and returning home times, it may start acting up.
This can include greeting you with unusually high or low temperatures when you return, or the thermostat suddenly turning off while you are still home. There are a couple of features that can cause this.
Auto-Schedule
The auto-schedule function tracks a user’s activity with GPS and automatically sets a working schedule for the unit. If at any point, your timetable suddenly takes a big change or an app reads the data wrong, it may work in strange patterns.
Eco-Mode
Eco-Mode is a low energy consumption regime activated when home conditions don’t need to be actively adjusted. When activated, it will not let it exceed allowable limits to save on electricity. Users can set both upper and lower limits as they like. The default thresholds might not fit your climate, thus causing discomfort.
Early-On
The HVAC can’t make home conditions perfect in seconds; it takes a certain time. And an Early-on feature helps to compensate for it. It uses your geolocation and learned schedule to start working in advance. When any of those is not correct, you may return home while it still doesn’t feel ok.
Home/Away
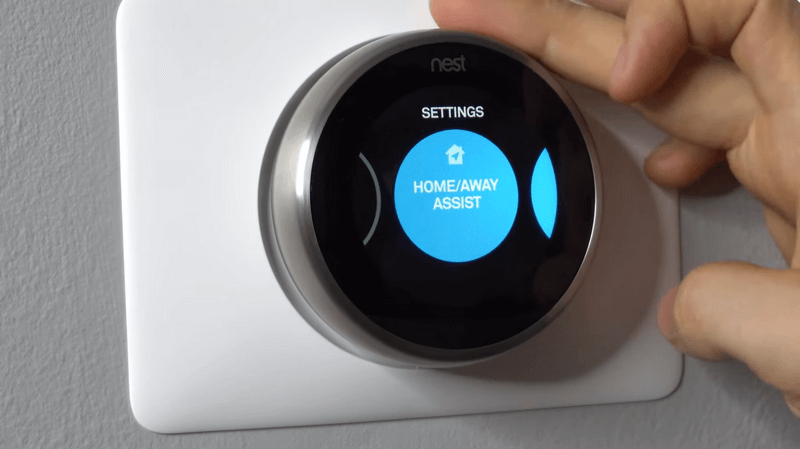
Using an app, a thermostat knows whether the owner is home or not. It tweaks the climate control’s work accordingly. Though it is cost-effective, not everybody may feel comfortable about their movement being tracked or having to wait while conditions at home get back to normal.
Check out our related post: Thermostat room temperature and setting do not match
How to Stop Nest Thermostat from Changing Temperature
The main causes of temperature tweaks are features using which your device can learn and change its settings by itself. It creates the schedule automatically, but if the program makes a poor guess, the thermostat’s commands will become irrational and unpredictable.
There are various ways to fix this depending on the nature of your problem — thermostat suddenly turning off as if you have left home; the temperature is not back to a comfortable level by the time you get home; you are annoyed that the temperature changes on its own in general. Now, we will go over all possible ways to stop the Nest Thermostat from automatically changing the room temperature.
Adjust a Schedule
If your routine has recently changed, your Nest thermostat might not have time to get up to speed with it. This can be a reason behind its irregular work. Another explanation is that it got it wrong for any reason in the first place.
Whatever the reason, an incorrect schedule can be fixed in a matter of minutes with a Nest mobile app. Here is what you need to do:
- Open an app and make sure you are logged in.
- Choose the needed thermostat if you have more than one connected to it.
- Click schedule.
- Change the temperature set points so they correspond with your current routine.
Create a New Schedule
If you open a schedule and see that it is wrong beyond repair, do not bother wasting time on fixing it. A much better option is to set a new one. To do so, follow these steps:
- Open the Nest mobile app.
- Select your thermostat.
- Select schedule.
- Instead of fixing existing set points, create new ones.
Delete a Schedule and Start Over
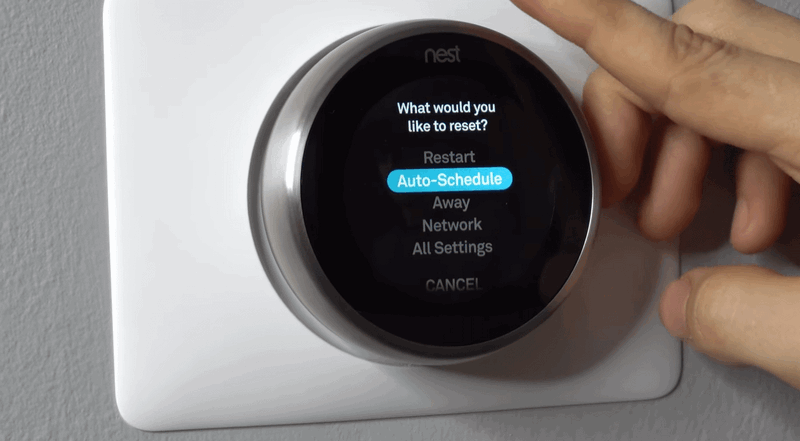
You may be asking, “Why should I set a schedule on my own? It is a smart device after all, isn’t it?” You are absolutely right, and there is a way to let it build a new schedule from scratch. This way, Nest will get a chance to learn and, hopefully, get everything right this time. To delete an existing schedule, you should:
- Go to your Nest thermostat and choose settings from its touchscreen display.
- Select the “Reset” option.
- Go to Schedule.
- Click either “Clear” or “Reset;” both will do the trick.
Disable Certain Smart Features
If everything seems to function right, but some smart features get on your nerves, you can easily switch them off. This won’t interfere with an auto-scheduling function, so you don’t have to worry about jeopardizing your Nest thermostat. It will still learn from your activity and pick the most effective working patterns.
Some Nest users don’t feel great about the Home/Away feature, so we will use it as an example. This feature uses your gadgets to determine if you have left your home and turns the HVAC off and on accordingly. If you don’t want it to happen every time you take a 30-minute trip to the nearest store and back, you can turn the Home/Away feature off. To do so, simply go to the settings of your thermostat through a Nest app as we described before, find it, and disable it.
The same works for any of the thermostat’s smart features — Early on, Eco mode, or even Auto-Schedule.
Disable a Thermostat’s Self-Learning Capabilities
The Nest thermostat will constantly learn and try to find an optimal work regime. This means that sudden changes in temperature will happen from time to time as a result of it. If such a scenario doesn’t really work for you, it is possible to disable your Nest thermostat’s learning feature. It will still follow the schedule you’ve set up manually but won’t make changes to it or track your activity.
Follow these steps to get your Nest under manual control:
- Open the Google Nest app and select your connected thermostat.
- Go to settings.
- Disable all smart features: Auto-Schedule, Home/Away, Early On, and Eco mode.
- Set up a schedule manually: choose desired temperature points throughout the day.
- Save settings and close the app.
How to Set Nest Thermostat to Hold Temperature
If you have small children or elderly parents who don’t leave the house too much, pets that are sensitive to temperature changes, or any other reasons to maintain stable conditions at home, the Nest thermostat got you covered. Its “Hold” regime will make it function as a regular thermostat and set a temperature level at which it will keep your home all the time.
You can activate it both through an app and directly on the thermostat itself. Whatever way you choose to do it, here is how you can set your Nest Thermostat to hold the temperature:
- Go to Nest main menu.
- Go to “Hold.”
- Choose either “Eco” or “Current temperature.”
- Select how long you want the temperature to be maintained. The spread is from 30 minutes to 24 hours. If you want the regime to last indefinitely, pick the “Eco” option and select “None” for the time period.
- Save settings and exit.
A “Hold” can be turned off any time you want. Simply go to the main menu again, choose Hold, and disable it. After that, the thermostat will get back to a manually set schedule or use smart features if they are enabled.
In Conclusion
Nest thermostat has smart features that allow it to automatically track your schedule and optimize the heating and cooling so they are both comfortable and cost-effective.
The changes in your routine, mistakes in the learning algorithm, and other factors can make the thermostat act up and change the temperature. This can be fixed by adjusting or deleting the current schedule or disabling smart functions.