Is your wall heater frustrating to use because the thermostat is in an inconvenient spot? Do you find yourself bending down or reaching up high just to adjust the temperature? If so, you’re not alone. Many homeowners with wall-mounted heaters deal with this same issue.
The good news is, that you can easily fix this problem by installing a separate thermostat on your wall. Adding a wall-mounted thermostat to your heater gives you precise temperature control right at your fingertips. No more uncomfortable bending or reaching required!
In this post, I’ll walk you through the complete process for how to add a thermostat to a wall heater. You’ll learn:
- Why installing a wall thermostat is so convenient
- The step-by-step method for wiring and connecting your new thermostat
- Helpful tips to ensure proper installation and operation
- Safety precautions you need to take when working with electrical
With just a few tools and some basic handy skills, you can install a thermostat on your wall heater’s power supply in no time. Then you’ll be able to easily control the temperature from a comfortable height. So if you’re ready to say goodbye to thermostat frustration, let’s get started!
Why Put a Thermostat on the Wall?
Some wall-mounted heaters have separate thermostats that you can attach to a wall. Other units are attached to the heater’s body.
Consequently, you would have to bend over to adjust the thermostat since most heaters are mounted at the lower part of the wall. And so, the only convenient way to operate the thermostat is to mount it higher where you can easily reach it without bending over.
But convenience is not the only reason you want to install a thermostat higher up on the wall. Inaccurate room temperature readings are another factor to consider when installing a smart thermostat for your wall-mounted gas heater.
Since hot air rises and cool air sinks, the lower part of the room is also cooler. If you want your thermostat to function properly or if you want it to read the accurate room temperature, you should place it as high as your chest or neck.
It’s also worth noting to check if your thermostat is compatible with your wall heater before proceeding with the installation.
RELATED: How To Turn On Wall Heater In Apartment
Step-By-Step Wall Thermostat Installation Guide
Adding a thermostat to a wall heater shouldn’t be a complicated task if you know how to handle electrical wires and devices. Otherwise, you may want to consider hiring a professional.
Step #1: Turn off the main power source
Electrical wires and devices pose an electrical shock hazard. Before touching the wires or any electrically energized component on the device, you must switch off the circuit breaker.
Switching off the main power source will prevent any electric current from running through the wires. And thus, you’ll avoid getting an electrical shock while trying to install a thermostat for your wall heater.
Step #2: Refer to the manual’s wiring diagram
After making sure no electric current runs through the wires, your next step is to take out the operator’s manual. The manual should contain the wiring schematic that you will use as a guide to connecting the thermostat to the wall heater.
Here, your main concern is connecting the wires from the power source to the thermostat. And also, connecting the wires from the thermostat to the heater.
Study the wiring diagram carefully. Make sure you know which wires will go to their designated terminal blocks. You’ll need to determine which ones are the circuit feed wires as well as the wires that connect the thermostat to the heater.
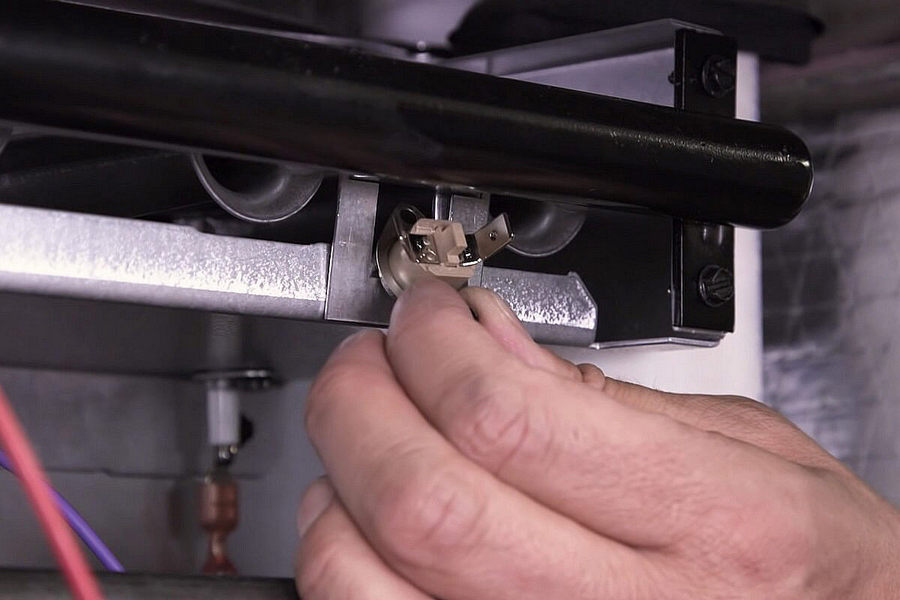
Step #3: Expose wire tips by removing insulation
Before connecting the end of a wire to a terminal, you have to make sure to expose the tip of the wire by removing the insulation. Use a wire stripper to remove at least ¾ of an inch of insulation.
Removing too much insulation might cause a short circuit and will damage your thermostat or heater. On the other hand, you can choose to not expose the tip of the wire when connecting it to the terminal as some technicians would. That said, removing some insulation at the tip of the wire ensures a good flow of electric current between wires and terminals.
Step #4: Make ground wire connections
Grounding an appliance is essential in any electrical wiring since it prevents people from getting shocked in the event of a short circuit. If you have an old thermostat, chances are it comes with a metal enclosure that needs to be grounded. Some have an extra copper wire for ground connection.
If your unit has an extra wire for grounding, it usually comes bare (exposed) or with a green insulator. Connect or join it to another grounding wire.
Interestingly, many of today’s modern thermostats don’t have any connection for grounding. The plastic enclosures act as insulators to prevent any electric shock.
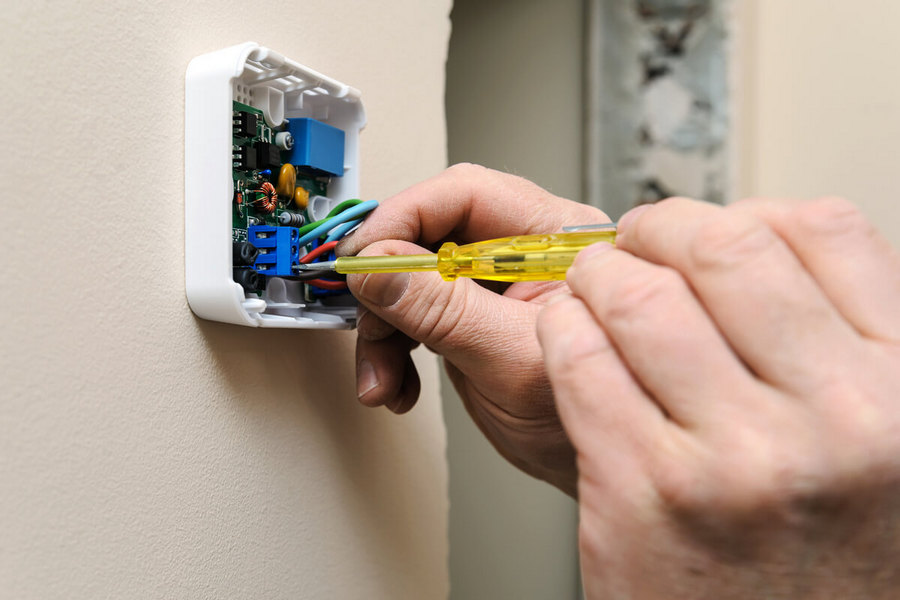
Step #5: Confirm the wiring and connect the wires
Check how many wires are coming from the wall. Typically, modern thermostats like smart or programmable ones require only a couple of wires. If so, it means your unit is powered by batteries, especially if it’s a smart thermostat.
In case there are three or more wires, it could mean your unit requires an external power source.
Refer to the manual when connecting the wires. Generally, the terminals have labels so you’ll know which wire should go to which terminal. Make sure all the connections are tight. Loose connections can cause overheating within the wires that may lead to a fire.
Lastly, if your unit requires batteries, you may want to add them now.
Step #6: Mount the thermostat to the wall
Set how high up the wall your thermostat should be mounted. Once you’re done, you can now secure the thermostat on the wall using the screws that came with it. You may also want to read about moving a thermostat location.
Step #7: Turn the power back on and check if it works
Flip the switch of your circuit breaker and turn the thermostat and heater on. Test the unit by turning on your AC or furnace at different temperatures.
If your unit is not functioning as expected, you should seek help from professional technicians in your area.
Wrap Up
As you can see, adding a thermostat to your wall heater is a straightforward DIY project.
Now that you know how to safely wire and mount a thermostat, isn’t it time to finally say goodbye to bending over and fiddling with outdated dial controls?
If this step-by-step guide gave you the confidence to upgrade your wall heater, let me know how it goes in the comments below! I’d love to hear if this tutorial helped you install a more convenient thermostat to reinvent your existing wall heater.
- Why Put a Thermostat on the Wall?
- Step-By-Step Wall Thermostat Installation Guide
- Step #1: Turn off the main power source
- Step #2: Refer to the manual’s wiring diagram
- Step #3: Expose wire tips by removing insulation
- Step #4: Make ground wire connections
- Step #5: Confirm the wiring and connect the wires
- Step #6: Mount the thermostat to the wall
- Step #7: Turn the power back on and check if it works
- Wrap Up